Is it crazy that I love thrift stores? I have to admit that the Volunteers of America is one of my favorite stores. Yes, I know it isn't glamorous like Banana Republic or The LOFT, but since this post-baby weight isn't melting off of me, clothing stores are the furthest from my mind right now. I break into a cold sweat at the thought of trying on bathing suits. Yep, there go the sweat glands working on overdrive...
So I have taken a liking to home stores, decor and DIY projects. Although I cannot see quick results in my transition from jiggly to less jiggly, I can quickly transform my home and the items in it. Even better, the prices are CHEAP and budget-friendly, which is music to my hubby's ears. And to top it all off, they have sales too! Each week, there is a label color chosen for 50% off . Could it get any better? By golly it can and it has!
They have a Frequent Shopper Program (be still my heart):
If you spend $15, you get 15% off
If you spend $20, you get 20% off
If you spend $25 or more, you get 25% off your next purchase
Sweet sassy-mo-lassy! I can't wait until my next shopping adventure...I wonder what treasure I will find next!
Thursday, April 28, 2011
Tuesday, April 26, 2011
This Little Light of Mine...
Do you remember the lamps that I bought on my thrift store shopping trip? Well, I decided that it was finally their time to shine (nice pun, huh?).
Although, I hadn't decided what I wanted to do with them yet: paint the base white, silver or keep it gold. With Kimi's recommendation, I went with white. It just seemed to match better with the crisp white duvet cover that our bed was sporting these days. Yes, the lamps are fully functional and in great condition. I even felt kind of guilty as I walked them down to be stored in our basement, but I knew that the revived lamps would look even better in the space.

So armed with my trusty tools, I got to work on makeover fit for Nate Berkus. Okay, maybe that is a stretch, but as my celebrity boyfriend, I knew that he would appreciate it.
Using a grocery bag, I cut a small slit in the bottom center of the bag and pushed the socket through the hole. I took small pieces of painter's tape to line the perimeter of the cap and cover the top of the lamp that was exposed. Taping always feels like the most unproductive part of the process, whether it be a small piece like these lamps or the walls of a room. I loathe doing it because it feels like a waste of time, but whenever I try to get away without doing it, I regret it. Since my mind was filled with visions of grandeur, I decided that it was better to be safe than sorry.

Pulling the bag tight, I cut the handles off to create an "even" opening. Removing the handles made it much easier to tape the bag closed around the base.


I wasn't in love with the brown cord, but knowing that it would hang behind and blend in with our nightstands, I taped the end to prevent the white from spreading. I ended up putting the length of cord in another grocery bag to keep it clean during the painting process.

Now for my favorite part of the process - PAINTING! It is so rewarding to see new life given to an item with a simple coat of paint. In my experience, I have found that Rust-oleum has the best paint. Not only do they offer a HUUUUU-GE selection of colors, but they offer "Ultra Cover" for 2x the coverage! This cuts down on the number of cans and the number of coats. Plus, it seems like it is easier to prevent drips because it is easier to control the coverage. No, I am not being compensated for saying this, but I wish I was!


Another benefit of the Ultra Cover Rust-oleum Paint is the short dry time! I told you that I like to see quick results! I waited about 20 minutes in between coats and about 2 hours before I moved them inside. After peeling off the tape, I was ecstatic about the results...
 |
| BEFORE |
 |
| AFTER |
The lamp matches our curtains perfectly and offers the perfect pop of color in our room. Next step: Artwork for above the bed.


Have you ever purchased an item from a garage sale, thrift store or even rescued it from the dumpster with hopes for a makeover? Do you think Nate Berkus would love my results?
Tummy Tickles & Silly Songs

Smiles. Giggles. Kisses. Tummy Tickles. Silly Songs. This is what our life has been like these days. Maddie keeps us busy and on our toes, but we wouldn't want it any other way. It is exciting to see her developing skills so quickly. Each day it seems like she has discovered something new. Lately it has been her toes.

Along with her toes, she has a fondness for her pointer finger. It ALWAYS finds a way into her mouth. I think that she may be teething (due to the excessive amounts of drool), but people tell me that she is still too young. Either way, she rarely seems uncomfortable with the process and enjoys chomping on her finger.

Maddie LOVES her Daddy. Her face lights up when he walks into her line of sight. They have a special bond that Mommy cannot come close to matching. Saturday mornings have been classified as "Maddie-Daddy Time". I dream of the days when they will go on dates, make pancakes together on Saturday mornings, and make many more special memories together.

This is our life...I am trying to drink in the moments that we have together. The evenings fly by and weekends are never long enough. I try hard not to blink because before I know it, she will be a big girl.
What can I say? We are truly blessed.
Wednesday, April 20, 2011
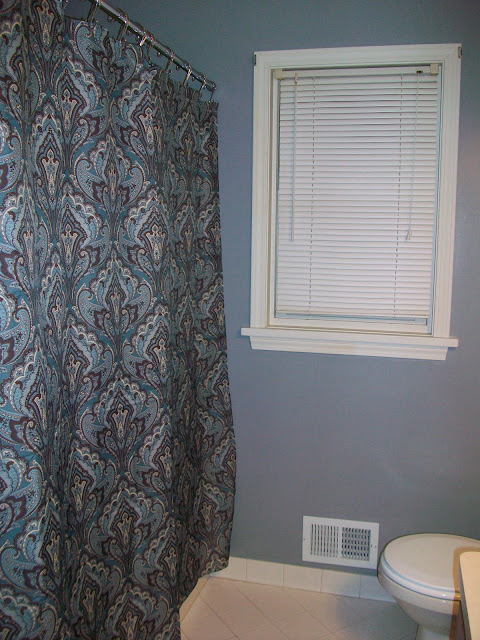
Guest Bathroom
Remember how I mentioned that when I see something in our home that I want to change that it needs to be instantaneous? Well, sometimes my OCD kicks in and my Type-A personality revs into overdrive without thinking. This is basically how and why our guest bathroom was tackled in one day. Crazy right? Well, how about if I tell you that it was actually only 18 hours before my in-laws were supposed arrive. from out of town. to stay with us. for the weekend. Okay, now do you see how crazy I am?
Well, let me preface this by saying that the shower, vanity, toilet, mirror and floor stayed the same.
The bones of the room was in good condition, but a few items would irritate me everytime I looked at them. It was fully functional, but just wasn't my taste.
Enter: towel bar and toilet paper holder
The towel bar was located over the toilet, which meant that when you washed your hands you had to walk a few steps (dripping your wet hands all over the bathroom) to get to the towel. The TP holder was a different problem. It was the first thing that you saw when you walked up the stairs. Much to Mamasita's dismay, I have a tendency to leave the door open to the bathroom. When it's not in use! C'mon give me a little more credit than that...anyways, when we were growing up, my sisters and I were notorious for leaving our bathroom door open when we left it. Which wouldn't bother most people except for my extremely sweet, yet OCD mother. (I wonder if that's where I get it from?) I swear it was her biggest pet peeve (or maybe it was leaving dishes and pop cans in the sink) and we never failed to do it constantly. So now that I have my own home, she will still close the door everytime she stops by and give me "the look". You know the look. The one that says "you know better than this". Yeah, I am currently working on perfecting my look on my husband. It is good, but not as effective as Mamasita's look. Anyways, the TP holder had to go. Did I mention that both fixtures were the ceramic kind? Yeah they weren't anything close to the brushed nickel hardware that I was dreaming of. So they had to go. Immediately. Like before my in-laws arrived.
Why I decided to start demo-ing these fixtures around 10 PM (when Lowe's and Home Depot are closed! "Smooth move, Ex-lax" 10 points for knowing that movie reference), I have no idea. I got home from some activity and was literally itching to get started. I remember thinking that the cermic pieces must simply be covering a metal bracket like our TP holder in the powder room downstairs. So, out comes the hammer and the screwdriver. Tap, tappy, tap...next thing I know there is a HUGE hole in the wall above my toilet. WHAT THE...sweet molasses?! At this point there was no turning back. I figured there was one hole, why not add 2 more? So I continued to remove the other side of the towel holder and then the TP holder. By now it is close to midnight and Home Depot doesn't open until 6 AM. So I formulated my plan of attack for the next day and hit the sack. Did I mention that I have visions of grandeur for this room? Like new shower curtain, hooks, paint, light fixture, vanity pulls. Yeah, well I also didn't have any of it previously purchased. Okay, now I am treading on insane. What was I thinking?! I was thinking that I cannot live one more day with this bathroom in this state, let alone have my in-laws see it this way. Now my in-laws are some of the sweetest people ever so the bathroom would never have bothered them if it stayed that way for 100 years, but it bothered me. So at the crack of dawn I leaped out of bed to head to HD. An hour later, I headed home With Materials in hand and a rough plan for tackling these holes. My mind was on warp speed. I had 2 hours to get these holes filled so that when I ran out to get a shower curtain (and pick out paint to match), the light and the vanity hardware, they would be dry enough to sand down for the first coat of paint. Okay, at this point my in-laws, let's call them B & K, were set to arrive "around 3". Yeah, i know you are saying "Are you crazy?! You don't know when they are arriving?" or maybe you are saying "REALLY? You HAD to start the project the NIGHT before they were arriving?" YES. I. DID.
Anyways, after a Super Market Sweep-esque shopping trip, I returned home to paint. By this time, I had enlisted my parents to help. Please keep in mind that Mamasita was recovering from surgery on her shoulder and had her arm in a sling. But she was a trooper. She climbed a step ladder in our tub to do the "cutting in" portion. (I know it was not safe at all! for goodness sake, the woman was in a sling! I was trying hard not to think of her falling. Egads!) So by the time B & K arrived, we were sweat-dripping, sling-toating, back-aching, yet extremely proud of what we had accomplished. You may be asking yourself, "uhm, where was Ben?" yeah, he helped where he could but it was tough enough having 3 adults in that bathroom, so he took care of cleaning /prepping the rest of the house for their arrival.


Since their visit, I have made some minor tweaks by adding art taken by my sister in law, Rachel , a towel rod behind the door, free-standing TP holder, and some accessories to the counter.
Who would have thought that a candle and some rice would work as a decorative accent? Not I! I saw this on one of my favorite blogs, Young House Love.
Well, let me preface this by saying that the shower, vanity, toilet, mirror and floor stayed the same.
The bones of the room was in good condition, but a few items would irritate me everytime I looked at them. It was fully functional, but just wasn't my taste.
Enter: towel bar and toilet paper holder
BEFORE
 |
| Taken during our walk-through |
 |
Why I decided to start demo-ing these fixtures around 10 PM (when Lowe's and Home Depot are closed! "Smooth move, Ex-lax" 10 points for knowing that movie reference), I have no idea. I got home from some activity and was literally itching to get started. I remember thinking that the cermic pieces must simply be covering a metal bracket like our TP holder in the powder room downstairs. So, out comes the hammer and the screwdriver. Tap, tappy, tap...next thing I know there is a HUGE hole in the wall above my toilet. WHAT THE...sweet molasses?! At this point there was no turning back. I figured there was one hole, why not add 2 more? So I continued to remove the other side of the towel holder and then the TP holder. By now it is close to midnight and Home Depot doesn't open until 6 AM. So I formulated my plan of attack for the next day and hit the sack. Did I mention that I have visions of grandeur for this room? Like new shower curtain, hooks, paint, light fixture, vanity pulls. Yeah, well I also didn't have any of it previously purchased. Okay, now I am treading on insane. What was I thinking?! I was thinking that I cannot live one more day with this bathroom in this state, let alone have my in-laws see it this way. Now my in-laws are some of the sweetest people ever so the bathroom would never have bothered them if it stayed that way for 100 years, but it bothered me. So at the crack of dawn I leaped out of bed to head to HD. An hour later, I headed home With Materials in hand and a rough plan for tackling these holes. My mind was on warp speed. I had 2 hours to get these holes filled so that when I ran out to get a shower curtain (and pick out paint to match), the light and the vanity hardware, they would be dry enough to sand down for the first coat of paint. Okay, at this point my in-laws, let's call them B & K, were set to arrive "around 3". Yeah, i know you are saying "Are you crazy?! You don't know when they are arriving?" or maybe you are saying "REALLY? You HAD to start the project the NIGHT before they were arriving?" YES. I. DID.
Anyways, after a Super Market Sweep-esque shopping trip, I returned home to paint. By this time, I had enlisted my parents to help. Please keep in mind that Mamasita was recovering from surgery on her shoulder and had her arm in a sling. But she was a trooper. She climbed a step ladder in our tub to do the "cutting in" portion. (I know it was not safe at all! for goodness sake, the woman was in a sling! I was trying hard not to think of her falling. Egads!) So by the time B & K arrived, we were sweat-dripping, sling-toating, back-aching, yet extremely proud of what we had accomplished. You may be asking yourself, "uhm, where was Ben?" yeah, he helped where he could but it was tough enough having 3 adults in that bathroom, so he took care of cleaning /prepping the rest of the house for their arrival.
AFTER


Since their visit, I have made some minor tweaks by adding art taken by my sister in law, Rachel , a towel rod behind the door, free-standing TP holder, and some accessories to the counter.
Who would have thought that a candle and some rice would work as a decorative accent? Not I! I saw this on one of my favorite blogs, Young House Love.
Have you ever tackled a project on a crazy timeline? Did you make it? Would you do it again?
Tuesday, April 19, 2011
Farmhouse table
Our home has gone through quite a transformation in the 3 years that we have lived there. The previous owners took good care of the house, but had a different design style that myself. So taking the advice of Mamasita (my mom), who is a very wise woman, I have tried to take my time with each room rather than make snap design decisions. This is EXTREMELY difficult for me. When I see something in our home that I want to change, I want to fold my arms, wiggle my nose and have it done instantly without any mistakes or mess. Since this isn't realistic, especially with a wee bambina, projects tend to drag out longer than I would like.
For the past 3 weeks, I have been working on refinishing a table for our dinette. Originally, it was a Craigslist purchase for my craft room. It was a steal that I just couldn't pass up. The top was in decent condition, but the legs needed some TLC. Sadly, the chairs could not be salvaged and went to furniture heaven (at the end of our driveway on garbage day). It wasn't a big deal because it was going to be covered in my creations. That is until a few weeks ago when Mamasita recommended that I fix her up and use it upstairs. It was bigger than our current table and could seat 6 people rather than the current 4 seater we were using. (I told you she was wise!) Her advice was confirmed when my fantastically chic friend, Sarah, suggested the same thing! Eureka! It was destiny!


So with Spring Project Fever, Itore apart cleaned up my craft room to free up this diamond in the rough. I was excited and energized by the possibilities! Over the past few years, my style has evolved by reading the numerous blogs and following the amazing home decor projects of other people. I would classify it as "Traditionally modern" which I think is now called "Transitional" by many people. I love dark, rich woods (cherry, mahogany and espresso finishes) but have developed a fondness for crisp white details in furniture and accessories. With that in mind, I decided that I would touch up the farmhouse legs with a bright white and stain the top a deep rich tone.
This was my first attempt at staining and I was determined to add a notch to my toolbelt (and not in the "you need a bigger belt" type of way). After talking to some people and doing some research, I settled on a mahogany stain + polyurethane. Like I mentioned, I like to see results quickly and I did not have the patience to wait for multiple coats of poly to dry.

The project was a journey in itself. It wasn't a home-run, but I would consider it a base hit. (My sports-enthusiast husband would be proud of that baseball reference.) There are definitely steps that I would do differently in the future (and will potentially have to with this piece). Here are my learnings:
- Test, Test, TEST your color. In hindsight, I am not in love with the color that I chose. It used Bombay Mahogany. It turned out to be much more red that I had anticipated and will probably refinish the top in a darker stain in the future. But my excitement got the best of me!
- Stain with light, thin coats in the direction of the grain. If you use too much stain, your piece will look blotchy in areas.
- Stain + Poly is very finicky. It sets up REALLY fast so it is extremely important to work fast but in thin coats. You don't have the luxury of wiping it with a rag like the simple staining process. What you see is what you get.
- Sand with a fine paper in between coats. This helps to deepen the color without getting raised spots from the stain.
- Wait about 8 hours between coats to ensure it has fully dried, but keep in mind that temperature, humidity and the thickness of the coat can impact dry time.
- Tack cloth. Enough said, this tacky cloth (hence the name) is great for picking up dust in between coats. The creator of this product was a genius!
Here is the finished product. While I look for a full set of chairs for this table, I will be refinishing the current chairs in white to tie me over. Hopefully, I can get to those once the warmer weather settles in again.

Does anyone else have Spring project fever? What are you working on trnasforming in your spare time?
For the past 3 weeks, I have been working on refinishing a table for our dinette. Originally, it was a Craigslist purchase for my craft room. It was a steal that I just couldn't pass up. The top was in decent condition, but the legs needed some TLC. Sadly, the chairs could not be salvaged and went to furniture heaven (at the end of our driveway on garbage day). It wasn't a big deal because it was going to be covered in my creations. That is until a few weeks ago when Mamasita recommended that I fix her up and use it upstairs. It was bigger than our current table and could seat 6 people rather than the current 4 seater we were using. (I told you she was wise!) Her advice was confirmed when my fantastically chic friend, Sarah, suggested the same thing! Eureka! It was destiny!


So with Spring Project Fever, I
This was my first attempt at staining and I was determined to add a notch to my toolbelt (and not in the "you need a bigger belt" type of way). After talking to some people and doing some research, I settled on a mahogany stain + polyurethane. Like I mentioned, I like to see results quickly and I did not have the patience to wait for multiple coats of poly to dry.

The project was a journey in itself. It wasn't a home-run, but I would consider it a base hit. (My sports-enthusiast husband would be proud of that baseball reference.) There are definitely steps that I would do differently in the future (and will potentially have to with this piece). Here are my learnings:
- Test, Test, TEST your color. In hindsight, I am not in love with the color that I chose. It used Bombay Mahogany. It turned out to be much more red that I had anticipated and will probably refinish the top in a darker stain in the future. But my excitement got the best of me!
- Stain with light, thin coats in the direction of the grain. If you use too much stain, your piece will look blotchy in areas.
- Stain + Poly is very finicky. It sets up REALLY fast so it is extremely important to work fast but in thin coats. You don't have the luxury of wiping it with a rag like the simple staining process. What you see is what you get.
- Sand with a fine paper in between coats. This helps to deepen the color without getting raised spots from the stain.
- Wait about 8 hours between coats to ensure it has fully dried, but keep in mind that temperature, humidity and the thickness of the coat can impact dry time.
- Tack cloth. Enough said, this tacky cloth (hence the name) is great for picking up dust in between coats. The creator of this product was a genius!
Here is the finished product. While I look for a full set of chairs for this table, I will be refinishing the current chairs in white to tie me over. Hopefully, I can get to those once the warmer weather settles in again.

Does anyone else have Spring project fever? What are you working on trnasforming in your spare time?
Monday, April 18, 2011
Tufting and Nailhead trim
Nothing says "Glamour" like tufting or nailhead trim on a piece of furniture. Well, I guess diamonds and 24K gilding say that too, but I think that may scream it. I have always wanted a piece of furniture that incorporated these design elements.
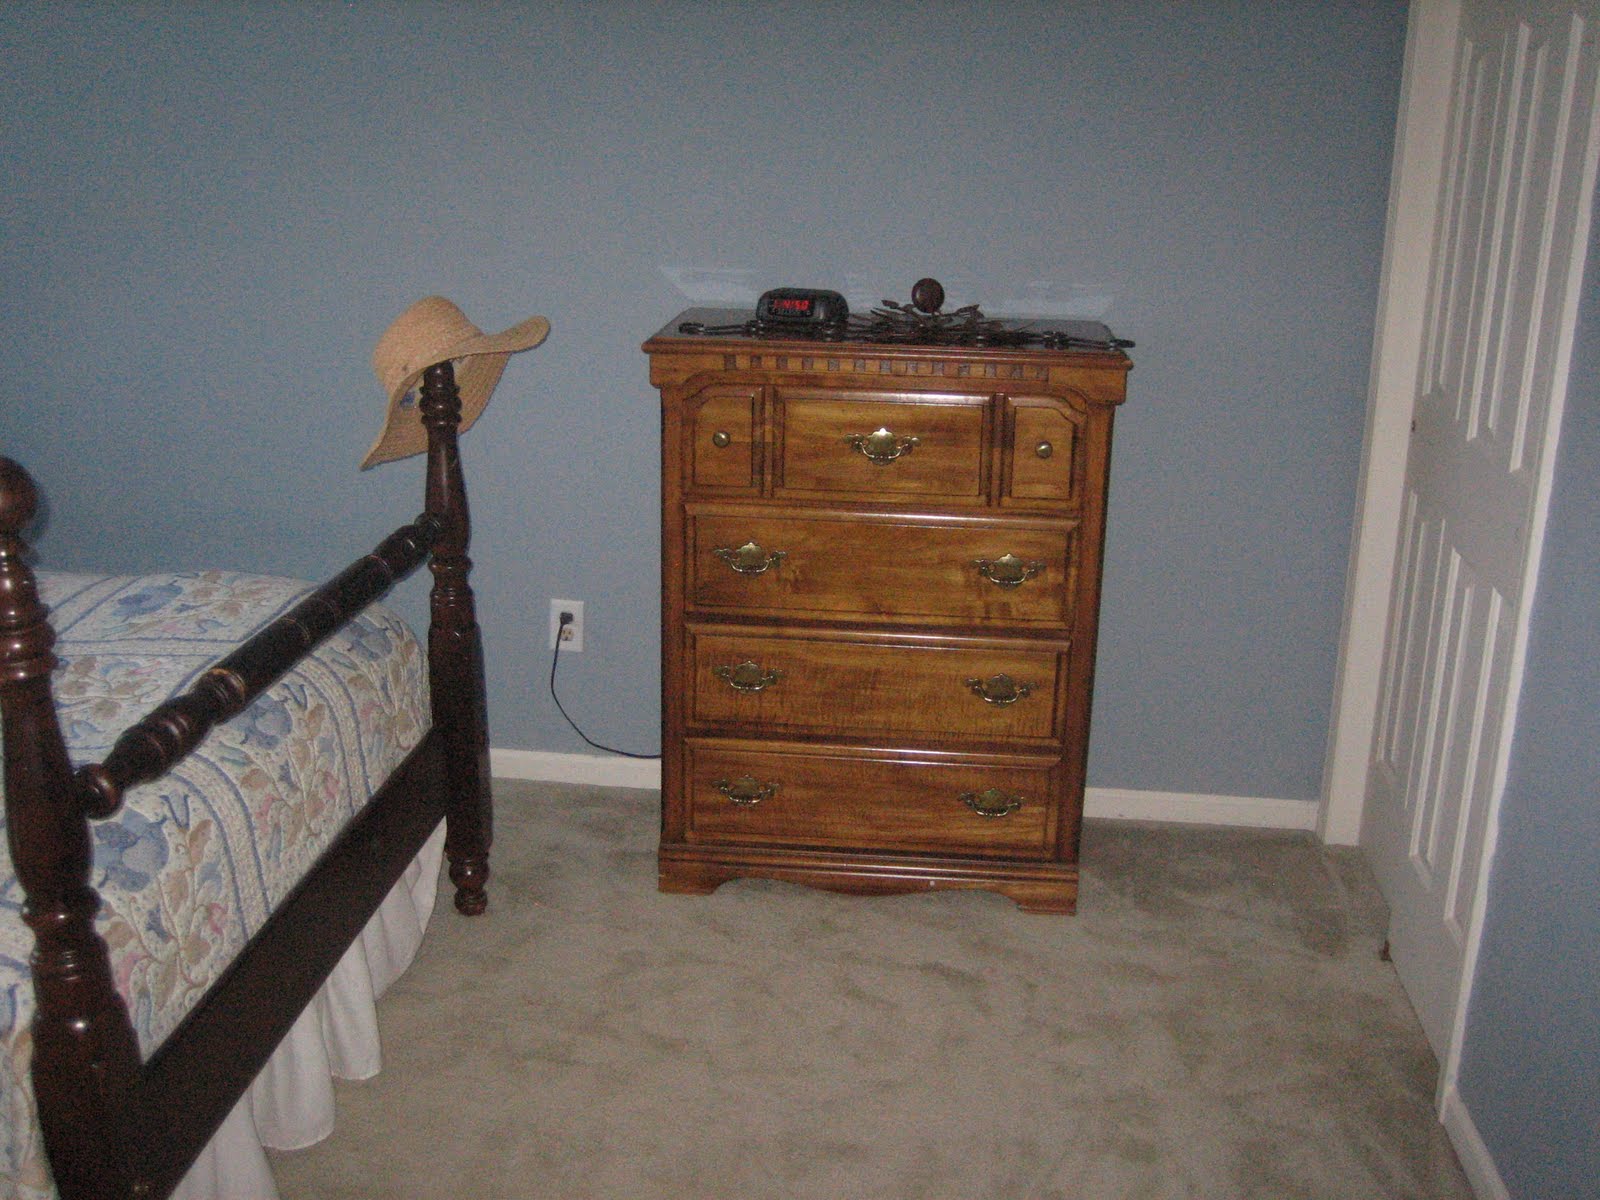
When we moved into Mi Casita, we brought my full size bed including its antique headboard and footboard. It was my childhood bed so it had seen (almost) 30 long years, which means that it had endured many little monkeys jumping on the bed. I feel terrible because it wasn't until we finally replaced the bed that I realized how bad it was! And this was our GUEST bed! Ugh! My friend, Sarah recently admitted that she thought the bed was going to fall apart when they stayed in it 2 years ago. The second issue was that the room looked...like a grandma lived there. I know that is harsh, but it did! It didn't reflect either of our taste, but seemed like the land of misfit...decor.


When the time finally came to replace the bed set, i realized it was my opportunity to bring a little glamour into our home. I loved the look and feel of hotel room beds. Although it is no Sheraton (don't they have the best beds?!), I wanted our guests (mostly my in-laws) to feel like they were staying in a welcoming retreat.
My dream was to incorporate BOTH design elements into the room - nailhead trim and tufting. Yes, it was a lofty goal considering it was my first stab at both techniques. After reading the tutorial on Apartment Therapy I decided to ditch the trim (for now) and attempt the tufting.
I had the fabric from an abandoned project, but I had to purchase the rest of the materials. I won't go into the details, because the tutorial did a great job, but it was a pretty simple project. The hardest part was attached the buttons to the board for the "tufted look". The tutorial says to use a long needle to push the thread through the foam and predrilled holes in the board and then go back through the same hole in the opposite direction. It is near impossible to hit the hole after pushing it through 2" of foam! So I tied the string to the button, pushed the thread through the covered board and pulled TIGHT. Because you are pulling the button so tight, it helps to have 2 people (I just did it myself, but it was a pain). I attached the end to a small button and stapled over the string using the small button to hold the covered button into position. Does that make sense? This process was also the longest part of the whole project. I think I spread it over
2 days...
I also used a french cleat (I think that's the name) to hang it on the wall. I got a 20" cleat from Hobby Lobby for about $14. The headboard is very light, so the cleat's weight rating was more than enough for the weight.


Overall the project was quick and very rewarding!
 |
 |


When the time finally came to replace the bed set, i realized it was my opportunity to bring a little glamour into our home. I loved the look and feel of hotel room beds. Although it is no Sheraton (don't they have the best beds?!), I wanted our guests (mostly my in-laws) to feel like they were staying in a welcoming retreat.
My dream was to incorporate BOTH design elements into the room - nailhead trim and tufting. Yes, it was a lofty goal considering it was my first stab at both techniques. After reading the tutorial on Apartment Therapy I decided to ditch the trim (for now) and attempt the tufting.
I had the fabric from an abandoned project, but I had to purchase the rest of the materials. I won't go into the details, because the tutorial did a great job, but it was a pretty simple project. The hardest part was attached the buttons to the board for the "tufted look". The tutorial says to use a long needle to push the thread through the foam and predrilled holes in the board and then go back through the same hole in the opposite direction. It is near impossible to hit the hole after pushing it through 2" of foam! So I tied the string to the button, pushed the thread through the covered board and pulled TIGHT. Because you are pulling the button so tight, it helps to have 2 people (I just did it myself, but it was a pain). I attached the end to a small button and stapled over the string using the small button to hold the covered button into position. Does that make sense? This process was also the longest part of the whole project. I think I spread it over
2 days...
I also used a french cleat (I think that's the name) to hang it on the wall. I got a 20" cleat from Hobby Lobby for about $14. The headboard is very light, so the cleat's weight rating was more than enough for the weight.


Overall the project was quick and very rewarding!
Sunday, April 17, 2011
My Goodwill Hunting
I love a good bargain. I think it is in my blood. At a young age, Mamasita (my mom) taught my sisters and I the joys of shopping. I can remember marathon shopping trips for back-to-school clothing and the preparation for the Black Friday deals. "Newspaper-Combo-By Myself- FIRST" was my battle cry every Sunday morning as I grabbed the newspaper for the sales ads. You see I had a system for screening the ads and it couldn't be disturbed by "others".
The love of bargain shopping has stuck with me throughout the years. When I walk into a store my eyes are immediately drawn to the brightly colored clearance stickers. I can spend hours (literally) perusing the aisles of a store in search of these stickers. The thrill of the hunt is just as enjoyable as finding the "deal of the century". It is such a rush of adrenaline! I imagine it is similar to what exercise junkies feel after a good run. But really? Is there such thing as "a good run"? Anyways, I have been known to purchase items without really "needing" them purely because they were such an amazing deal with high hopes of using them in the future. This can be quite irritating to my accountant husband, but I am convinced that I actually SAVE money by purchasing items when I see them rather than when I really need them.
So all of that to say that I started the weekend off with a shopping trip at some of my favorite bargain (thrift) stores. Here are a few items that I picked up:
I am in love with these lamps. Their shape echo the gourd lamps that are everywhere these days. I have been waiting for a pair to find its way into my home and now they have! I have some ideas for where these pieces will land, but I am not convinced of whether they will get a full makeover or just a few tweaks. Any suggestions? The lamps would look perfect in our master bedroom with some new crisp white shades and I can picture the bench beneath a console table in our living room.
Should I tackle the upholstery project or leave the beige fabric? Would the lamps look better in a different color? I would love to hear your ideas!
The love of bargain shopping has stuck with me throughout the years. When I walk into a store my eyes are immediately drawn to the brightly colored clearance stickers. I can spend hours (literally) perusing the aisles of a store in search of these stickers. The thrill of the hunt is just as enjoyable as finding the "deal of the century". It is such a rush of adrenaline! I imagine it is similar to what exercise junkies feel after a good run. But really? Is there such thing as "a good run"? Anyways, I have been known to purchase items without really "needing" them purely because they were such an amazing deal with high hopes of using them in the future. This can be quite irritating to my accountant husband, but I am convinced that I actually SAVE money by purchasing items when I see them rather than when I really need them.
So all of that to say that I started the weekend off with a shopping trip at some of my favorite bargain (thrift) stores. Here are a few items that I picked up:
 |
| Small bench - $9 |
 |
| Table Lamps - $13 each |
I am in love with these lamps. Their shape echo the gourd lamps that are everywhere these days. I have been waiting for a pair to find its way into my home and now they have! I have some ideas for where these pieces will land, but I am not convinced of whether they will get a full makeover or just a few tweaks. Any suggestions? The lamps would look perfect in our master bedroom with some new crisp white shades and I can picture the bench beneath a console table in our living room.
Should I tackle the upholstery project or leave the beige fabric? Would the lamps look better in a different color? I would love to hear your ideas!
Monday, April 11, 2011
From Stalker to Author...
Okay, I did it. I finally made the leap. I am offically (gasp) - a Blogger! I have been a Blog-stalker for about 3 years now. The list of my most frequented blogs is longer than my "To Do" list. It ranges from blogs written by friends and family to DIY and design blogs. I love reading the stories, projects, and recipes that each post captured, but I didn't think that I could do it.
Until now...
With some prodding by some friends and family, I have decided to try my hand at blogging. I hope to give you a look into "Mi Casita" (my home). I will try to share the things that I am passionate about - my family, food, DIY projects and design. I will try to be transparent and candid. I will try to experience new things. Bottomline: I will live and learn. It should be interesting to watch, right? I hope so!
Subscribe to:
Posts (Atom)